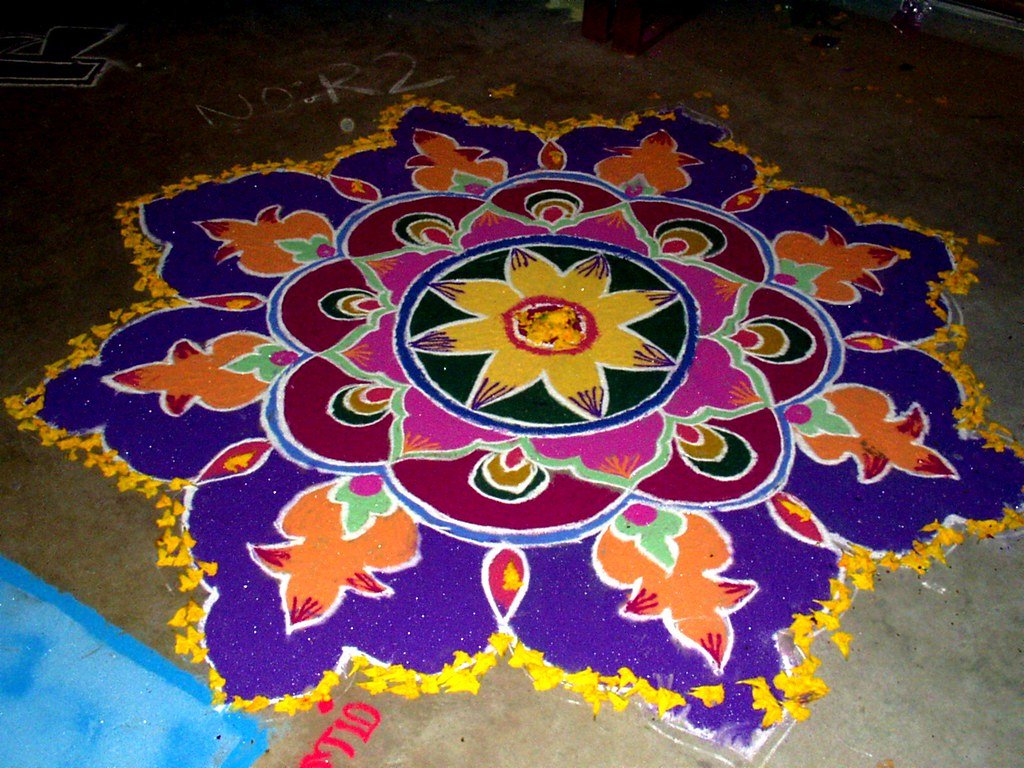
I think you know that 78% of modern Indian families spend less than 10 minutes on their daily Diwali rangoli.
I get it – between preparing sweets, cleaning the house, and managing kids, who has time for elaborate rangoli designs? After years of creating rangolis for both small gatherings and large celebrations, I’ve mastered the art of quick yet stunning designs.
Trust me, you don’t need hours to create beautiful rangoli patterns! Let me share my favorite 5-minute rangoli designs that look absolutely professional.
Essential Tools for Quick Rangoli Making
Oh, the number of times I’ve scrambled to find my rangoli supplies at the last minute! Let me tell you about the game-changing tools that have saved me countless hours. When I first started making quick rangolis, I’d waste so much time just gathering materials. Now? I’ve got it down to a science!
First things first – you’ll need a basic rangoli kit, but here’s the twist: organize it like a pro.
Get yourself some proper rangoli stencils – they’re absolute lifesavers. I remember trying to use paper cutouts once… let’s just say it didn’t end well in our humid weather!
Basic element
Here’s what your quick rangoli toolkit should include:
- A set of 5-7 basic rangoli colors (white, red, yellow, green, and blue are my go-to choices)
- 2-3 different sized stencils (trust me, these are worth the investment)
- A thin-tipped bottle for precise designs
- A few plastic spoons for quick color spreading
- A ruler or straight edge (I use an old credit card – works perfectly!)
- Small brushes for touch-ups
Simple Geometric Rangoli Patterns

Let me share something that changed my rangoli game forever – geometric patterns are your best friends when you’re short on time!
I discovered this when I had just 10 minutes before guests arrived for our Diwali dinner. Now I swear by these foolproof designs.
Geometric hacks
The secret to quick geometric rangolis? Start with dots! I create a simple 5×5 dot grid (takes literally 30 seconds) and then connect them in different patterns. Here’s my tried-and-tested method:
- Make a center dot
- Create 8 dots around it (think compass points)
- Connect them with curved lines
- Fill with colors in alternating patterns Boom! You’ve got a beautiful design in under 3 minutes.
Square pattern
Square patterns are even easier.
I love doing a quick 3×3 grid and creating concentric squares. My students (yes, I teach rangoli now!) I particularly love this one because it’s nearly impossible to mess up.
The trick is to use bold, contrasting colors – makes even the simplest design pop!
Here’s a time-saving hack I stumbled upon: Use diagonal lines! They make any pattern look more complex than it actually is. I once got compliments all evening on a design that was literally just diagonal lines connecting corner dots with different colors in each section.
Triangle-based patterns are my go-to when I’m super pressed for time. Three dots. Three lines. Add some color and small embellishments at the corners – done in 2 minutes flat!
Quick Flower-Based Rangoli Designs

Flower rangolis used to intimidate me until I discovered the “petal shortcut” method! You won’t believe how simple it is to create stunning floral patterns in minutes. I remember the day I figured this out – I was running late for a Diwali morning puja, and now it’s become my signature style!
Let’s start with my favorite 5-petal flower technique:
- Draw a small circle in the center
- Make 5 curved lines extending outward (like a star)
- Connect the ends with U-shaped curves
- Fill with colors – I love using yellow for the center and alternating pink and orange for petals
The lotus design is even simpler! Start with a dot, surround it with 6 small petals (quick U-shapes), then add a larger layer of petals around that. I once made this design for my friend’s Diwali celebration, and the other friends couldn’t believe it took less than 5 minutes!
Learn Rangoli Designs from grandmother
Here’s a pro tip I learned from my grandmother. When creating marigold-inspired patterns, don’t stress about perfection.
Real marigolds aren’t perfectly symmetrical either! Use quick, loose strokes to create petal shapes, and let the colors do the talking.
For leaf borders, I’ve developed a super-quick technique: Hold your rangoli bottle at a 45-degree angle and make quick, curved strokes. Alternate directions to create leaves, add a centerline, and you’re done! This border takes literally 60 seconds but looks incredibly professional.
Fast Freehand Rangoli Techniques
Okay, let me share a secret – freehand rangoli isn’t as scary as it seems! After years of practicing, I’ve discovered some shortcuts that make freehand designs actually faster than using stencils.
I remember being terrified of freehand work, but now it’s my favorite way to create quick, unique patterns.
Swirl rangoli
Here’s my go-to swirl pattern creation suggestion. So that you can do it easily.
- Start from the center
- Make an outward spiral motion
- Add smaller swirls branching out
- Fill spaces with dots or small curves This entire design takes just 3 minutes!
Pattern design
Quick line-based designs are perfect for beginners. I create parallel lines, then cross them diagonally. The secret? Don’t aim for perfection – slight irregularities make it look more artistic!
I once did this pattern when my rangoli powder was running low, and it turned out to be a hit.
For peacock patterns (everyone’s favorite!), I’ve developed a 4-step shortcut:
- Make one curved line for the body
- Add a simple spiral for the head
- Create quick feather shapes (just U-curves with dots)
- Fill with blue and green – instant peacock!
Time-Saving Rangoli Hacks
After countless Diwalis of trial and error, I’ve collected some amazing hacks that have literally saved hours of my time.
These aren’t your typical rangoli tips – these are real-world solutions for busy families who still want to create beautiful designs!
My favorite hack? CD cases make perfect circles, and geometry boxes create amazing symmetrical patterns.
For quick color filling, here’s a game-changer: use bottle caps! Place the cap in the center of your area, pour color around it, and lift – perfect circle every time!
I learned this trick from my neighbor, and it’s revolutionized my rangoli game.
Let me share my multi-color application secret:
- Mix colors in small paper cups
- Create your design outline
- Pour colors simultaneously in different sections
- Use a straight edge to clean up borders This method cuts coloring time in half!
Unique structure strategy
Pattern repetition is your best friend for larger spaces.
I create one small section, then repeat it four times around a center point. It looks complex but takes just minutes! My mother-in-law couldn’t believe how quickly I finished our Diwali rangoli using this technique.
For quick cleanup (because let’s be honest, this is important too!), keep a wide paint brush and dustpan handy. I also lay down newspapers around my working area – making cleanup a breeze!
Conclusion
Remember, a beautiful rangoli doesn’t need to take hours! With these quick designs and time-saving techniques, you can maintain the tradition while managing your busy schedule.
Try these patterns and mix and match elements then you will get the best experience of it. Don’t forget to involve your children – it’s a great way to pass on our traditions while making precious memories.
The best part? These designs are so simple that even beginners can master them quickly.
Remember to take photos of your creations – you’ll be amazed at how your skills progress over time. Happy Diwali, and happy rangoli making!


